Wednesday, February 21, 2018

Heart of Gold

I’m excited to share that one of my quilts, Heart of Gold, will be on display at QuiltCon in Pasadena, CA from February 22-25. QuiltCon is a modern quilting showcase presented by the Modern Quilt Guild, and I am a member of the Austin chapter. It's my first time to have a quilt in this show!

Heart of Gold 

39" x 50"

After taking Tara Faughnan’s Double Wedding Ring class I started to discover an affinity for solid color combinations. While working on that quilt, I saved every scrap trimming because I knew they needed to find their way to a new home. They came to life in Heart of Gold using Yoshiko Jinzenji’s shadow appliquĂ© technique I learned in her class at QuiltCon 2015. The multi-colored scraps represent imperfections and varied experiences that we bring to our hearts - sometimes messy and jagged, but when brought together with care and kindness, we nurture a good spirit and cultivate a Heart of Gold.


Here is a bit more about my inspiration for the quilt:

My close friends know that I love to collect idioms. In fact, I keep an entire journal devoted to them because I love to reflect on their varying meanings. One of my favorite idioms is a really popular one - Heart of Gold. One might use this expression to speak of someone who is kind, compassionate, and generous.

Additionally, I’m intrigued by the heart shape. Whether we send an emoji heart to a friend or draw a broken heart, we use this symbol to communicate emotions that represent some form of love - whatever that might mean to you.

Last year (2017), a special leader and educator whom I had the opportunity to work for passed away after battling some serious health issues. You would never have known the obstacles she was facing because she understood how to bring people together through optimism and grace. At her celebration of life, all the dots connected for me - she truly lived life with a heart of gold.

So, I was inspired to create a quilt that would be a visual reminder for me to live life with more kindness, compassion, and empathy for others. I’m so grateful for my friends and family that challenge me and show me how to be a better person through their actions.

Here are some photos of how I constructed the quilt:

Using a large piece of gold lame as the background, I arranged the scrap trimmings so together they would form a heart shape.

I placed a sheer layer of fabric gently over the scraps and carefully pinned everything in place.

A bright pink fabric seemed like a good fit for the back.
I basted my already heavily pinned top to form a quilt sandwich. This quilt sandwich had 4 layers - the backing, batting, gold lame with scraps, and the sheer top.
I quilted vertical straight lines with white thread and each line was about a centimeter apart from each other.


This quilt is hard to photograph. I do love a little shimmer.


Thursday, March 3, 2016

FIVE Ways to Hang a Quilt!

There are a variety of ways you can hang a quilt and these are my top 5 - in no particular order. Since there are so many approaches, my advice is don't stress and make do with what you have around the house! Soda tops, yard sticks, rulers, scrap fabric, old sewing machine needles....make it work!!!


1. The Hanging Sleeve
A D-sleeve is the standard sleeve for hanging. The "D" shape allows the quilt to hang flat and provides "give" in the sleeve.
Hanging Sleeve Tutorial (Part 1) by Jacquie Gering
Hanging Sleeve Tutorial (Part 2) by Jacquie Gering  

2. Corner Pockets
Another method of making a hanging sleeve for smaller quilts is to use two charm squares. Simply fold each charm square diagonally, wrong sides together. Then pin one charm square to the back of the quilt at the top left corner and the other charm square to the back of the quilt at the top right corner, aligning the raw edges of the charm squares with the raw edges of the quilt. After the binding is applied, the raw edges will be encased and a dowel can be slipped into the charm square “pockets.” The dowel can rest on two evenly spaced nails in order to hang the quilt.
Charm Square Video Tutorial by Beth Ferrier on Craftsy

I used a yard stick to hang this quilt. It only cost me 98 cents!
3. Curtain Rod/Hanging Loops
If you have a decorative rod, such as a small curtain rod, you can use that to hang your quilt and you won’t have to worry about hiding the rod behind the quilt.


4. Soda Tab
Hand stitch a soda tab on the back of the quilt and use a nail to hang it! Great for oddly shaped quilts such as a triangle or irregular polygon.
This is silly really, but it illustrates the point that you can use anything. You can also purchase small plastic rings. I hear that Austin Creative Reuse has them for CHEAP!


5. Clear Fridge Clips
Command Fridge Clips are a flexible way to hang your mini quilt because when you are getting tired of looking at your quilt...you can simply change it out. Thanks Kimberly Schneider for the great idea! If you can't find these clips at a local store, you can order on Amazon.

MORE!!! Other ideas/resources:


Here are some other types of materials you can use to hang quilts:
  • Dowel rods
  • Yardstick
  • Ruler
  • Craft Wood - 1/4" x 1"- 2"
  • Curtain rods
  • Circle loops
  • Soda Tabs
  • Command strips
  • Nails
  • Tacks
  • Screw eyes
  • Old Sewing Machine Needles

  • What's your favorite way to hang a quilt?

    Thursday, January 8, 2015

    My Last Quilt of 2014...A Baby Boy Quilt

    Happy New Year!!! 

    I realized this week that the last few months of 2014 were so hectic that I didn't have a chance to post my last quilt of 2014. It was created for my cousin and her new baby boy, Mitchell. Using 5 inch squares and 2.5 inch strips, I organized fabrics around on the design wall until I felt the colors were balanced.

    The finished quilt was about 40 by 44 inches. My favorite part is the sweet little bunny fabric I picked up at The Cloth Pocket here in Austin. It is called Furry Tales in Minty from the Littlest collection by AGF Studio. I coordinated the rest of the fabrics with that special print and I love how it came together from using fabrics I collected the past few years.
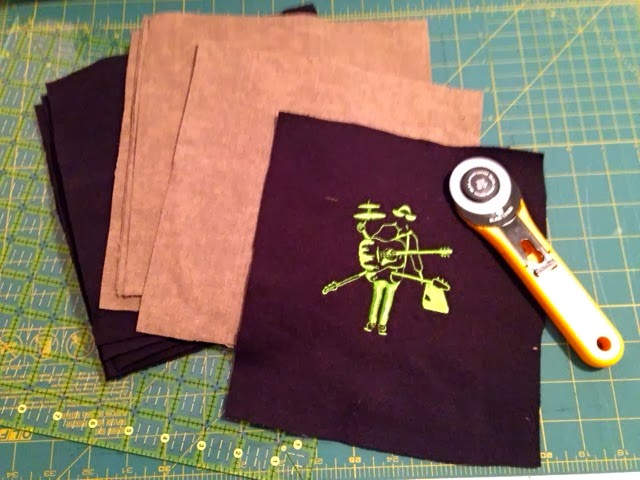
    Some of the fabrics I used were: Carolyn Friedlander Hand Drawn Stripes in Charcoal, Alison Glass Sunprint Feathers in Teal, Joel Dewberry Wood Grain in Vintage Yellow, and Kona Silver.

    Using leftover scraps, I dreamed up that Bunnyfish creature and two little crinkle sensory toys. I'm told by my cousin Nicole that babies loves those things. I think my cat would love a smaller version.

    For the backing fabric, I picked out a teal minky fabric. I originally chose a dark gray but once I had the top sewn together I changed my mind. On the quilting, I did semi-random straight lines. Overall, I think the finished quilt is soft and sweet for a little newborn baby boy!

    That closes up my quilts for 2014...can't wait to see what is in store for 2015!


    Monday, September 15, 2014

    Giveaway!

    I am guest blogging over at My Cuddle Corner today, the Shannon Fabrics blog! If you follow me on Instagram (@bettinadanger), you might remember a few photos my Fraction Remix Quilt. Check out the link above to see some more photos and get a few tips on sewing with Cuddle Fabric.

    Some of the fabrics I used in the Fraction Remix Quilt were from this kit and here is your chance to win it!!!


    http://www.shannonfabrics.com/fresh-picked-fabulous-5-brcuddle-kit-p-6167.html

    To enter to win this cuddly kit, tell me what you would make with it in the comments below!

    Winner will be announced Friday, Sept. 19th at 5pm. Best of luck!


    Saturday, August 2, 2014

    The Laurel Dress

    I woke up today thinking about the Laurel Dress by Colette Patterns. Earlier in the year, I made this dress and found the pattern to be simple and easy to follow. There are a ton ways to customize this pattern and even a free Digital Ebook with instructions for different variations.

    Friday, July 25, 2014

    A few things...

    Let's see how many times I can write "few" in this blog.

    It's been such a hectic few months and I haven't written a blog since May. I guess a few months isn't too bad. If you are curious about what I've been sewing or doing on my vacation from work, follow me on Instagram @bettinadanger! Leave a few comments!

    Sunday, May 18, 2014

    Baby Quinn's Quilt

    A few months ago my mom requested a quilt for a baby boy. The quilt is done, the baby is born, and I am finally getting around to posting a few photos! I'll share the best photo first...

    Wednesday, April 30, 2014

    Power of Ten Quilt

    I am convinced that right now is the BEST time to be a math educator!

    I don't know if you have noticed, but the subject of teaching mathematics is certainly in the spotlight as our state and national standards have changed. This makes me incredibly happy because it is the perfect opportunity for everyone to learn more about quality math instruction. Teaching math is different than what we might remember from our experiences learning it. Teaching math is also different from being "good" at the subject. And, if you think you are "bad" at it...I have life changing news for you: There is no such thing as a "math gene" and don't let anyone tell you otherwise.


    Wednesday, March 12, 2014

    WIP: Spring Break Edition!

    I'm trying to use every precious minute of spring break to check some things off my to-do list!

    So far,  my "Power of Ten" quilt is quilted!

    Sunday, February 16, 2014

    MQG Riley Blake Challenge Quilt: Rectangle Floor Plan

    I've completed my Modern Quilt Guild Riley Blake Challenge quilt and I'm calling it the...

    Rectangle Floor Plan *

    When I began sketching my design for this project, I honestly wasn't thinking about anything having to do with math education. (Mom, are you laughing? Stop. I really do think about other things besides math.) Actually, I tried to incorporate some of Heather Grant's modern quilt ingredients from the Austin Guidelines. In particular, I focused on negative space and grid work but I'm not confident that the final product reads those things. Having to actually commit to an ingredient really increased the dopamine activity in my brain. This caused me to have lots of questions and I realize that I have much more to keep learning about. : )

    Nevertheless, my math passion found its way into this quilt. I've been learning quite a bit about using open tasks in the math classroom, and think that this quilt could spark some great discussion. A question/task is open when a variety of responses are possible. 

    Here are some open questions I thought about:
    1. Write a number sentence using one or more of the polygons in this quilt.
    2. The answer is 5, what could be the question? or equation?
    3. What could be a fraction to represent one or more of the rectangles? 
    Don't forget to ask, "How do you know?" Always ask for justification!

    If you are a educator, parent, math lover or learner, give these questions a try with friends! Of course, it's got to be with friends so you can appreciate and learn from the variety of responses.

    On a side note, I also could have been channeling myself as an 8 year old girl. I would have loved this quilt on the floor when I was playing with my Barbies and Trolls. Henry thought it was a robotic bunny. See how open this quilt is! ; )

    I'll leave you with a few photos of the back and the quilting (which was all quadrilaterals until one irregular hexagon snuck in there). If you follow me on Instagram (@bettinadanger) I posted a photo of that crazy polygon!

    Finished quilt size is 51inches by 51 inches.


    Thank you for reading. Have a wonderful Sunday! : ) Try out an open question and tell me if it was any good!

    Friday, January 24, 2014

    "Flow Zone" Block of the Month: Photos of the Finished Quilt

    January of 2014 has been wonderful! After coming back from my trip to Lincoln, Nebraska for the New Year, I felt refreshed and inspired to finish quilting my "Flow Zone" Quilt. I've been meaning to post photos of the finished product, but just haven't found the time to look through the images and pick my favorites. Today I am grateful for Texas Snow Days! ;-) Thank you, LISD, for canceling classes so I could check this post off my to-do list!

    Here are a few of my favorite photos:


    I created a pillow to match using Elizabeth Hartman's Cat Quilt Along. The cat blocks were quick and easy to make!

    This Crate and Barrel Lounge Sofa was one of my Christmas presents! I think it looks a bit lonely with only one pillow, but don't worry...I've decided that this couch is going to puke spring this year! To be continued with better photos...

    Well, this concludes the "Flow Zone" Block of the month! Thank you all for playing along with me! Stay warm and cozy out there! XOXOXO

    Sunday, December 29, 2013

    Recycled T-Shirt Logos

    These are recycled logos in their finest moment! A once stained t-shirt that was worn for many months has taken on a new life and the fabulous, glow-in-the-dark 'Henry + the Invisibles' logo will live again as a brand new tote bag. A once torn up, discarded hoodie is now the center of attention as a useful bucket to hold anything your heart desires.
    All items are recycled with love and are sure to live a beautiful second life!

    Here was my process for attaching the logo onto the canvas:
    I carefully cut out the logo from the old t-shirt and ironed a Pellon Clear Fuse on the back. This way the logo would fuse to the fabric and not shift when placed on the front of the canvas. A zig zag stitch around the perimeter of the logo secures it in place.

    For the sweatshirt, I used the same process as above, but I didn't waste the rest of the sweater material after I cut out the logo. It became the lining for the basket.

    I'm know I'm not the only one with a favorite t-shirt that doesn't get any more use because of a tear or stain...but if you still love the image, I say give it a useful second life!

    Thursday, December 26, 2013

    "Flow Zone" Block of the Month: Finished Quilt Top

    Today I finished putting together the quilt top for the "Flow Zone" Block of the Month. Now, I'm just waiting on my backing fabric so I can begin quilting!

    Once I had all the blocks organized in a way that I loved, I decided to use the neutral color fabric (Kona Bone) for a sashing between the blocks. I used 2 inch strips between the blocks and 3 1/2 inch strips on the outer border. Now, you don't even have to do this part if you don't like it. It's your quilt so you can do whatever is appealing to you!
    Since this is the first quilt for a couple of people participating, I recommend signing up on Craftsy and enrolling in the Free Block of the Month from 2012 by Amy Gibson. Around lesson 13, she walks you through how to put the blocks together, make the quilt sandwich and tips for quilting! You can start and stop the video as much as you want. You might even get the urge to make some of the blocks for a larger quilt top.

    OR email me and I'll be happy to help with any questions!

    Feel free to post photos on the progress of your quilt in the Flickr groupAt the end of January, I would like to have a party for all the people that participated. I'll touch base with everyone in the near future with more details.

    Until then, I hope everyone is enjoying the break! Happy Holidays! :)


    Friday, December 13, 2013

    Fraction Mug Rug

    Do you remember that interactive fraction strip quilt I created this year? Well, I've been dying to make one on a smaller scale to try out some different color options before I make another large quilt. When the Austin Modern Quilt Guild had a white elephant mug rug exchange I thought it was the perfect opportunity to experiment since I truly believe mathematics is beautiful! There will be many more of these fraction mug rugs in the near future. So, I'll just leave you with a few photos of how it turned out.

    Front
    Back - I love how the patterns emerge!

    I found a mug at Crate & Barrel that matched nicely.

    It's free-motion quilted with gray and teal on a black backing fabric.

    :-) I'm told that it went to a very mathematical family. 
    I hope they do some problem solving over morning coffee! ;-)


    Sunday, December 8, 2013

    A Blend of the Old and the New

    At certain times in my life I've used the saying, "Out with the old and in with the new" to express the changes in life that deal with replacing old things or old people with new things or new people. On this last Thanksgiving trip home, I came to realize that this saying just isn't working for me anymore. I'm beginning to think that the personal changes in my life right now are a beautiful blend of old things and old people with new things and new people!

    This is certainly true of many items that I've sewn in the past few years. For example, this apron is one of those old things that I look at and say, "wow, I think I could do that better," but why replace it? I mean, seriously...
    Look at my sweet Polish grandmother, completely cheesin' in her "cheesy" colored apron! Would I make this color apron again, probably not, but does it even matter when I see that smile? Absolutely not.
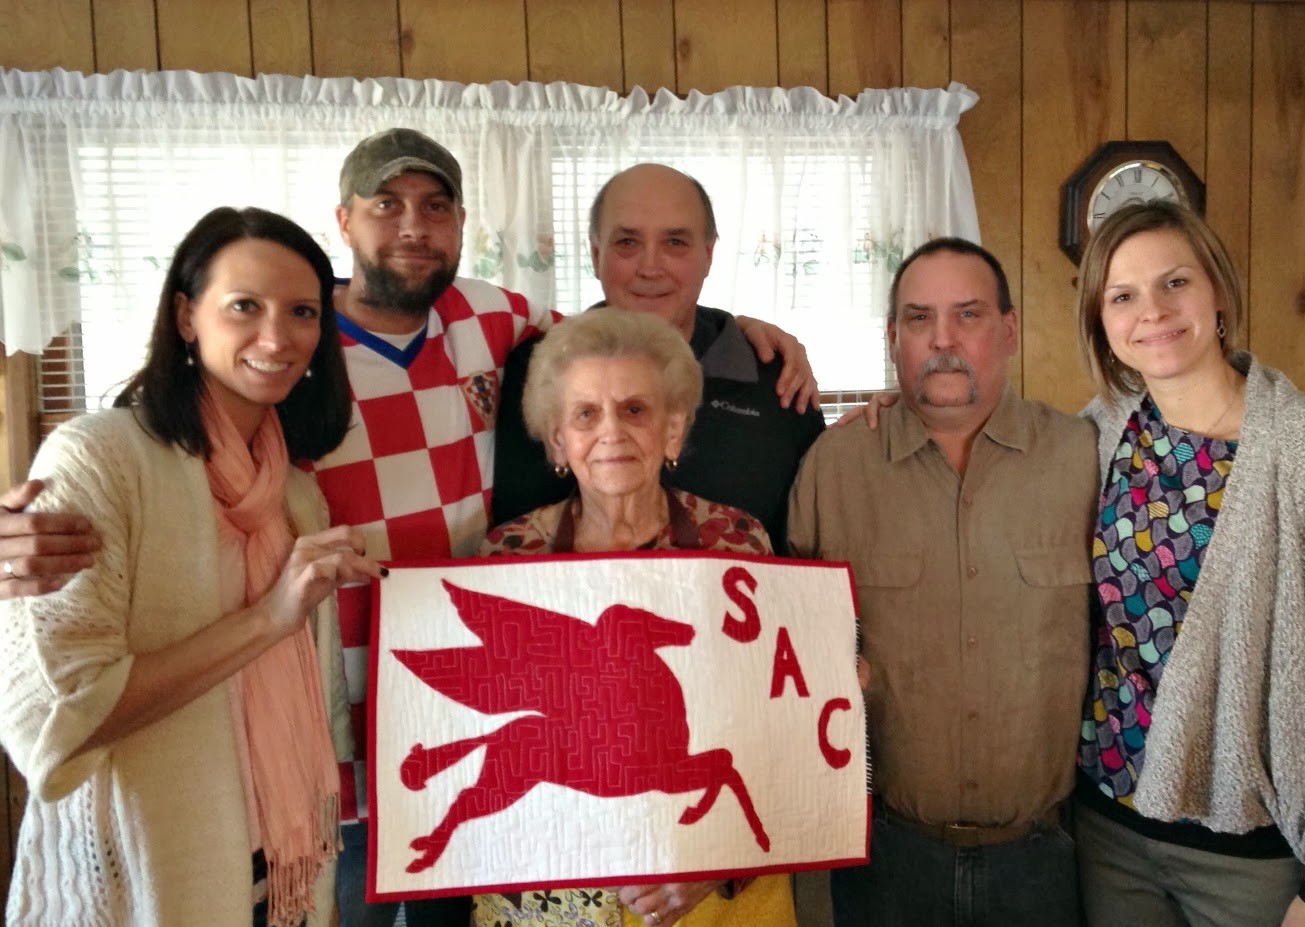
    Here's a family photo (cousin, grandmother, 2 uncles and brother) with a portion of the Chinderle Family. That pegasus mini quilt was quilted for my brother (he's the one with the hat on in the back) and it has my father's initials. Don't get me wrong, this pegasus quilt does not replace my father, but it is something new I can create to basically say what this sign says on his grave...
    My Uncle Brian hung that sign. Uncle B is the next on the list to receive a pegasus. In fact, he even asked me about how he could get one...little did he know I already have the fabric cut for it! Ha! I love when things work out like that.
    I also spotted my first 'Bettina DANGER' label! Totally forgot about this until I saw the apron. 
    Not sure what I was thinking before, but I'm so glad I invested in new labels shortly after that! (I ordered them on Etsy from Worldwide Label...not sure if there is a local place that does this, but I won't need labels for 10 years because I keep discovering more layers of labels in the little box they came in.)

    These last two photos crack me up. On the left, these were items that I brought home for gifts in 2011 when I first began sewing-before I had ever tried to sew a quilt or had this blog. The items on the right are creations I delivered home this last week. One thing is for certain, I've been introduced to some beautiful fabrics since 2011! I guess these two photos also show where I have arrived in my learning, making meaning from old projects and blending that learning into new projects.

    With an abundance of inspiration in this world, I'm stoked to imagine what the next 5 years will bring to me as the last few years of sewing have brought an incredible amount of happiness to my life. As time is driving by, I'm going to appreciate every moment to learn from the old to create the new that will blend with the old...or something like that.